Foundation
Dark Room - Photograms
What is a photogram?
A photogram is a photograph print made by layering objects onto photographic paper and exposing it to white-light, this causes the paper to react and create negative shapes and spaces.
A photogram is a photograph print made by layering objects onto photographic paper and exposing it to white-light, this causes the paper to react and create negative shapes and spaces.
What is a dark room?
The darkroom is a room used for developing photographs. In the darkroom we use film or photographic paper, the chemicals on photographic paper react to white light, so in the dark room there is a red light this helps us see in the dark room but also because it does not react with the photographic paper. The use of a red light doesn't harm black and white photography.
What I did to make my photograms/how the darkroom works
I
In this task we created photograms in the dark room. To do this we chose a selection of little objects to place on the photographic paper, we used enlargers these are basically boxes with light inside that first transmits the light through a negative and then a lens. So when the paper is placed into developer we begin to see the objects that we placed on top of the paper appear but the objects are white and the background is black. The image is then placed into the 'stop' chemical this then stops the paper from developing further. Thirdly the image is placed into the 'fix' chemical, the stabilises the image and makes it insensitive to any further exposure from white light the paper must be left in for 5 mins. Lastly, the image is rinsed off in the sink that is filled with water, this rinses off any residue from the chemicals before the paper is dried.
We did multiple different types of photograms such as: double exposure, solarisation, a sandwich print and one where we painted on the developer.

|

|

|

Movement photogram
To the right is my example of a movement photogram that I made in the darkroom. To do this I used as strip of film and placed it on the photographic paper under the enlarger. To do this I took the number of seconds that the photograph needed to create a fully exposed photo and then divided it by the amount of times I moved the object in this case I did 4 divided by 5 to get 0.8 seconds. I then put the paper in the developer I then began too see image appear and I could see where the light had exposed the image as the areas where the film had been were much lighter. 
Solarization photogram
To the right is my example of a solarization photogram. To do this the photographic paper is exposed like normal, once I had placed my objects on top, but its developed in a very different way. Instead of leaving the paper in the developer for 1-2 minutes , its left in the tray for only a few seconds until the image starts to develop. Once the image starts to develop, I took the paper out of the tray and re-exposed under the enlarger. Then place the photo back in the developer and develop as normal. 
|
Double Exposure Photogram
To the left is my example I made in the dark room of a double exposure photogram. To do this I placed some objects on the photographic paper and exposed it for half the full time twice, for the second time I moved the objects. For example, for this one I exposed it for 2 seconds twice to add up to 4 seconds to get the full exposure. The second round of 2 seconds I moved the objects around, so when I placed the paper in the developer two lots of the objects appeared as it had been exposed twice. 
Sandwich print photogram
To the left is my example of a sandwich print photogram that I made in the darkroom. To do this I took an existing photogram I did of a cassette tape just regularly in the dark room, I then put another piece of new photographic paper over the existing photogram with the side with the chemicals on sandwiched on top. I then put a big square of glass on top of the two pieces of paper to press them together, this also inverts the colours. As you can see this photogram is white background while the cassette tape is black this is the opposite to the other photograms. 
Weaving photogram
To the left is my example of a weaved photogram. To do this I used two already developed contrasting images, I cut them into 1 cm strips. I then began to weave them together. It then created this black and white image. |
Pinhole Camera
A pin hole camera is probably the simplest camera, it is based off of the camera obscura which is a large room or container that has been blacken out except for a small hole of light. The pin hole camera doesn't have a proper lens instead it is a tiny little hole that is covered by the 'electrical tape' , when trying to take an actual photo using the pin hole camera you remove the 'electrical tape' for a few seconds to let the light into the can.
Ben Nathan creates images using a pin hole camera. His artistic skills reflects on the functionality of the city and its industry and documenting urban change. His explorations into infrastructure and photography questions the changing nature of our cities environment and access to public or private space. His work is displayed below. . His images using the pinhole hole camera are much clearer and more well done than the images I created.
Ben Nathan creates images using a pin hole camera. His artistic skills reflects on the functionality of the city and its industry and documenting urban change. His explorations into infrastructure and photography questions the changing nature of our cities environment and access to public or private space. His work is displayed below. . His images using the pinhole hole camera are much clearer and more well done than the images I created.

|

|

|
How i made the pin hole camera
1. Measure out a piece of card and cut strips into the top I did 1cm strips. Also measure out a circle the size of the can lid
2. Using a can opener take off the lid of the beer can
3. Wrap the card around the beer can and fold all the strips inwards and gaffer tape together so no light is getting in- this is crucial
4. Place the circle on top and then tape the lid with gaffer tape
5. Make a small hole in the front of the can using a pin
6. Cover the hole with electrical tape


My images
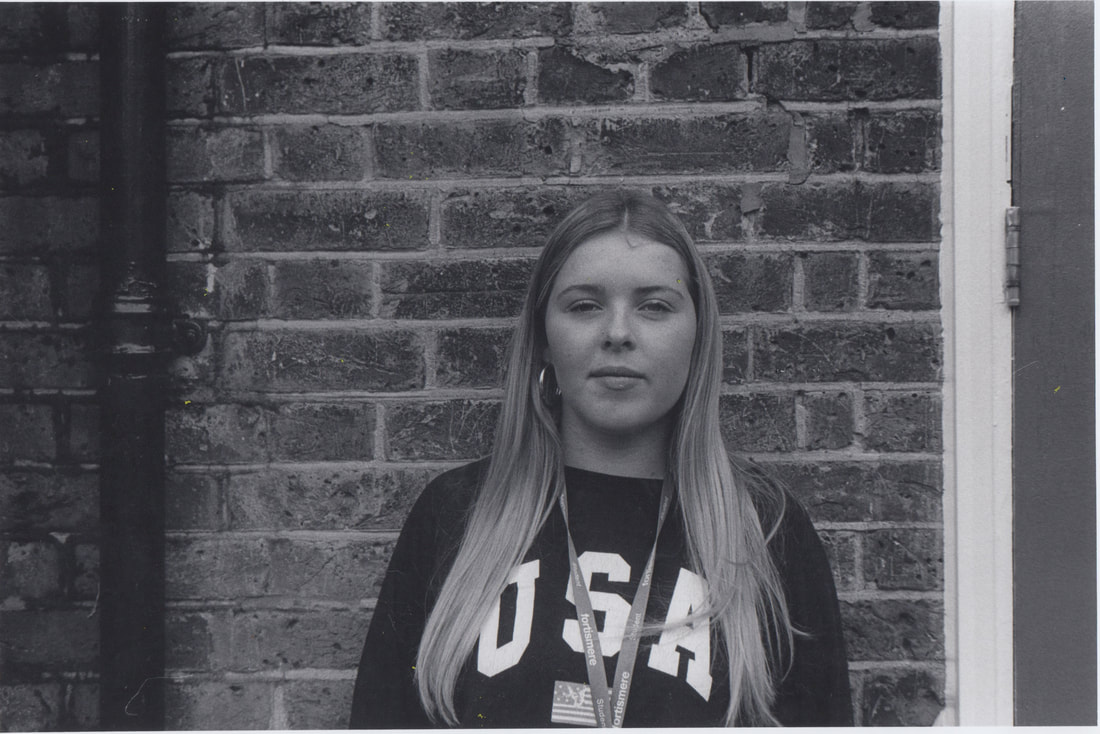
Below are the images I took using my pinhole camera. As you can see the images are quite blurry and not really in focus, this is because there is no lens. There is a shutter speed and aperture, the shutter is how long I take the tape off of the hole and the aperture is the size of the hole. Because there is no lens the image is not perfect as it doesn't have anything to make sure its in focus. Another thing that can effect the focus is if I moved while taking the image or my subject moved, for example the last image with a person in it. The image is not clear and the persons face is blurred this is because they moved as I took the photo, creating a distorted image. It is also clear that the images look curved, this is because the paper inside the can is curved while taking the image. If you went outside the buildings wouldn't be curved but they appear like that in the photo because of how the paper is placed. I then went into photoshop and inverted the images colours.
|
Original


|
Inverted


|
Film Camera
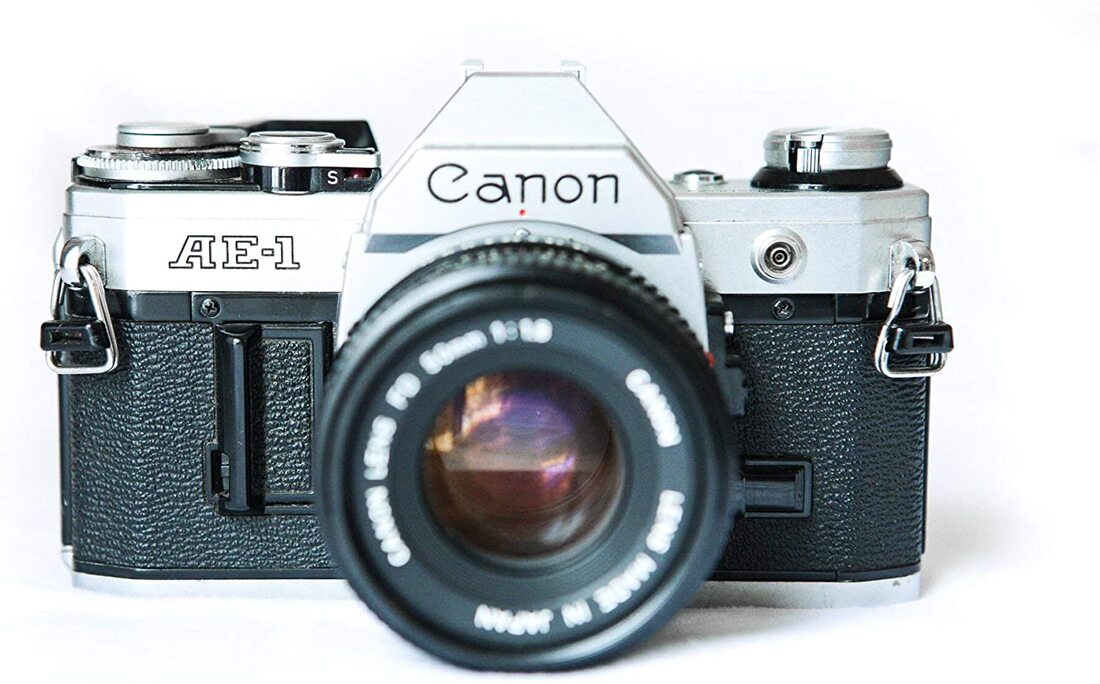
Film photography offers more involved, hands-on opportunities to learn the principles of photography. Many photographers will reject digital photography for film photography as it offers more thoughtful and rewarding photography. Unlike digital cameras film cameras do not have grid lines, or auto mode which automatically captures a well exposed photo. With film photography you really have to think about what your taking a photo of and force you too think about the lighting and other aspects.
|

|

|
Key features of the film camera
Lens - The function of the lens in a camera is to collect light from the surroundings and use that light to bring the subject into focus.
Film Lever - film advance lever is a film camera part that enables the camera to take one picture after another on different parts of a roll. When a picture is captured, the lever advances the roll to capture the next frame on it.
Aperture - Made up of small, very sharp blades, the aperture is another important part of film cameras that has a very important role in adjusting pictures’ exposure. The sharp blades which are fitted in the lens close or open to allow the exact amount of light needed to give the exposure any picture requires.
View finder - The viewfinder is the part of a camera through which you look to see the object that you want to take a picture of. It is the only part of a film camera that gives you an estimation of how the picture will turn out to be.
Shutter - A shutter of the camera determines how the incoming light affects the exposure of the picture being taken. By activating it, you can adjust the light intensity; hence, the exposure.
Shutter speed Control - It determines the time for which the shutter will remain open, and usually, it is in fractions of a second.
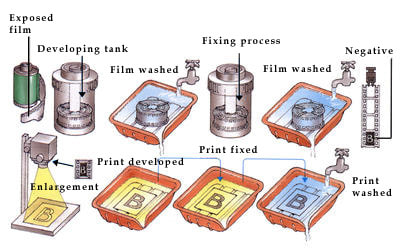
Developing the film
To develop the film you must not expose it to light at all as it can ruin the film. So when removing the film from the cassette into the film tank you must be in complete darkness. These are the steps on how I developed my film:
1) Opening the film cassette - Do not open your film until you are in complete darkness as exposing your film to even the tiniest level of light can destroy your negative. To open the film cassette, hook the edge of the lid under the cassette opener, then bend it to the side until the lid pops off.
2) Cut Film Off Cassette with Scissors - Take your film out of the cassette and cut it off with scissors. To do so, unroll the film until you reach the small plastic cassette in the center, then cut through the film where it connects with the piece of tape that secures the film to the plastic. You may have to feel around for this since it will be dark.
3) Load Film Onto Reel - To load the film onto the reel, begin by finding the slit on the edge of the reel and slide the film into it. Once secure, twist the side of the reel back and forth to wind the rest of the film. You’ll know it’s finished when all the film is securely wrapped around the reel.
4) Place Reel in Film Tank - Locate your film tank’s detached core, and slide it through the hole in the center of the film reel. Next, place the reel flat in the bottom of the tank so that the core is sticking up in the center. Cover your film tank with the lid and make sure it’s secured tight. This is where it will remain for the rest of the development process.
5) Create Developer Mixture - The developer mixture is used to develop film negatives in the tank, and while the exact amount will vary depending on the size of the film tank, it’s usually around sixteen fluid ounces of film developer mixed with sixteen fluid ounces of water. Mix the two ingredients in a metal or plastic container, not in the film tank itself.
6) Measure Temperature of Mixture - t’s vital to measure the temperature of your mixture to determine how long your film will need to develop.
7) Pour Mixture into Film Tank - You should see a lid on the uppermost part of your film tank. Be sure you are unscrewing this lid, and not the larger lid that is housing the film and sealing the tank shut. Pour the mixture directly down the funnel-shaped hole. Once the entirety of the mixture is poured in, immediately set a timer.
8) Spin film tank - First pour in developer and spin to make sure all film is being covered. Then pour stop mixture in and spin again, then pour fix mixture and spin. 30 seconds each
9) Rinse and Soak Film - After using fixer, your film reel is safe to remove from the tank. Thoroughly rinse the film with cold water for a few minutes to ensure they are no leftover chemicals. Next, soak your film in a wetting agent to help rid it of excess water and avoid developing streak or bubble marks.
10) Hang film to dry - Take your film off the reel and unroll it by twisting the sides of the reel in opposite directions. Then pull it apart, separating it into two pieces. Use a clothespin to hang the film to dry, and attach another to the bottom of the film so that it hangs taut. Let it dry for several hours before removing
11) .Clean and store film - Remove any excess streaks with a cleaner. It’s advised to cut the film five smaller strips of negatives so that you can easily slide them into a plastic sleeve. Sleeves provide protection, keeping negatives moist and free of smudges or debris. Leave them covered until you’re ready to develop your film. From here, you can move on to the printing process.
|

|

|
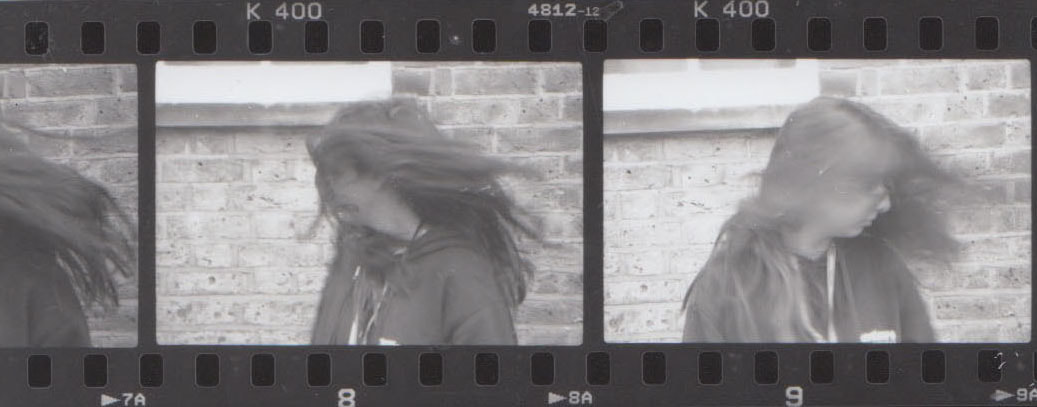
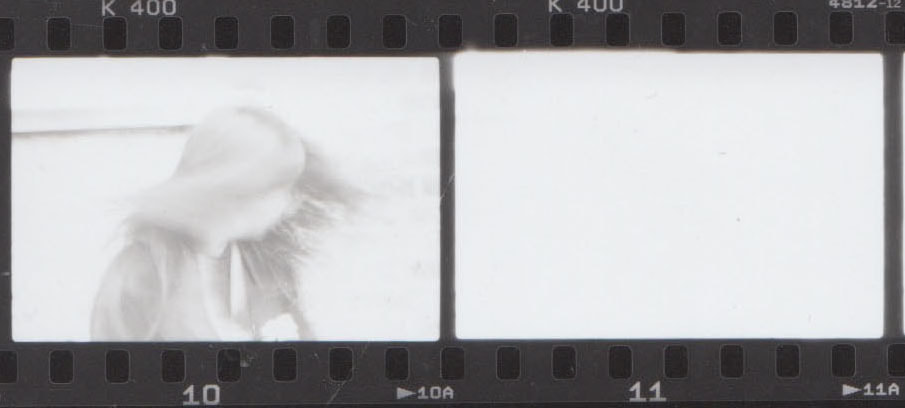
My First Film
In this task we used SLR film cameras to create a series of black&white film images. We were given 36 exposures of film with an IOS of 400. We went outside because that is where the most light is meaning we will most likely get better images rather than doing it inside. We were set a task to take several images with different shutter speeds and apertures.
Shutter speed - below are my images I took using different shutter speeds. As you can see the images on the far left are much darker but much less blurred, this is because I used a very fast shutter speed so the image is under exposed, not as much light has got in. As I used a slower shutter speed you can see the images get lighter and more blurred, this is because more light is being allowed in and the shutter takes longer to close. The last two images are overexposed, too much light has been let in.

|
|
|
Aperture - Below are my images I took using a different aperture each time. As you can see the image gradually gets darker, this is because the hole is getting smaller and smaller.

|
Contact sheet test strip

|
Contact Sheet

|
Print NO.1

Print NO.2


Print NO.3


